

Find the right domain for your idea
Search .com, .in and more and register your domain in minutes.
Table of Contents
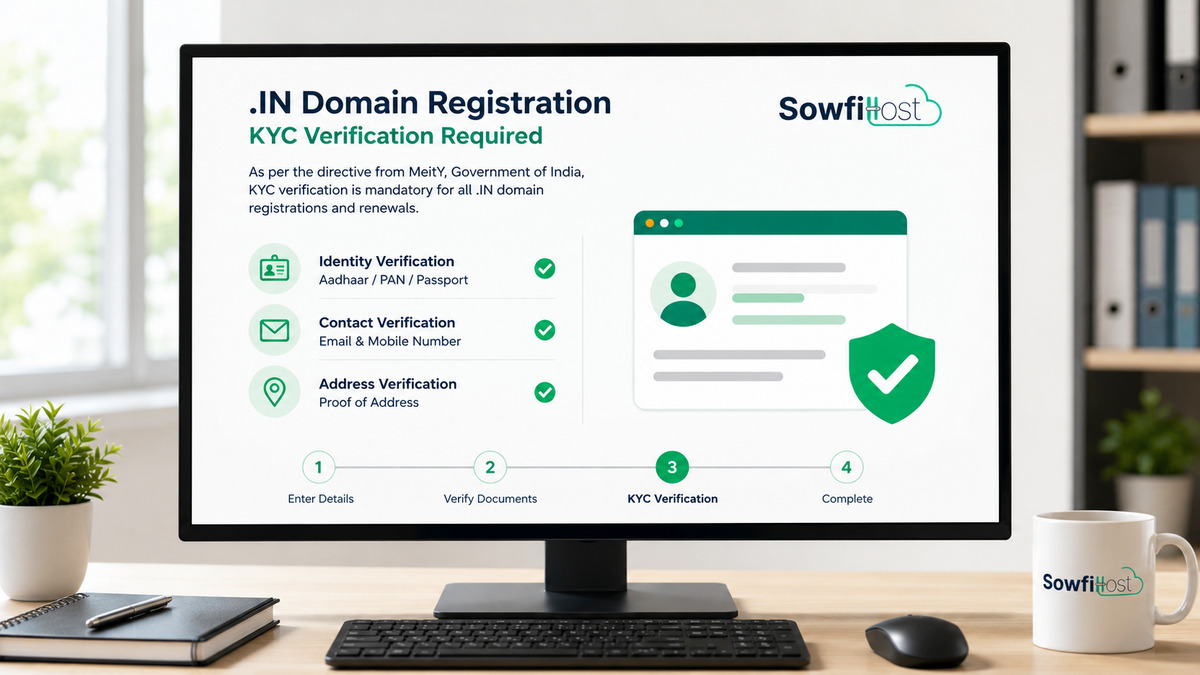
The National Internet Exchange of India (NIXI) now requires all .in domain registrants (new and existing) to complete a mandatory Know Your Customer (KYC) process.
This guide explains the reason behind this requirement and walks you through the fastest, paperless verification method - using DigiLocker.
Why Is KYC Mandatory for .IN Domains?
The .in country-code top-level domain (ccTLD) is India’s digital identity. The mandatory KYC, officially called the Know Your Registrant (KYR) policy, was introduced to:
-
Curb cybercrime & phishing - Anonymous domains are frequently used for fraud, fake websites, and malware distribution. Verified identities make it harder for bad actors to operate.
-
Enhance accountability - Linking every .in domain to a verified individual or organization ensures that registrants can be held responsible for misuse.
-
Comply with Indian regulations - Aligns with the broader push for a safer internet (MeitY guidelines, CERT-In directives) and brings .in domains on par with best-in-class ccTLDs.
-
Protect genuine brand owners & citizens - Prevents cybersquatting, trademark abuse, and impersonation, fostering trust in websites ending with .in.
Without completing KYC, your .in domain may be suspended or deleted after the registrar’s deadline.
The General KYC Verification Process
-
Your registrar (SowfiHost) notifies you via email/SMS that KYC is pending.
-
You log into your domain management panel.
-
You choose a verification method (Aadhaar-based eKYC, DigiLocker, or manual document upload).
-
You submit the required identity/address proof.
-
The registrar/NIXI validates the data, and your domain status changes to “KYC Verified.”
DigiLocker is the most seamless method, as it allows instant, government-verified document sharing without uploading physical scans.
Step-by-Step Procedure Using DigiLocker
This procedure is generic exact menu labels may vary slightly across registrars, but the flow remains identical.
Before You Start
-
Create an active DigiLocker account linked to your Aadhaar.
-
Your Aadhaar number or the Virtual ID (if you prefer to mask the Aadhaar number).
-
The issued documents in DigiLocker (usually Aadhaar itself serves as both identity and address proof).
-
A mobile number linked to Aadhaar to receive OTP.
Step 1: The KYC Process
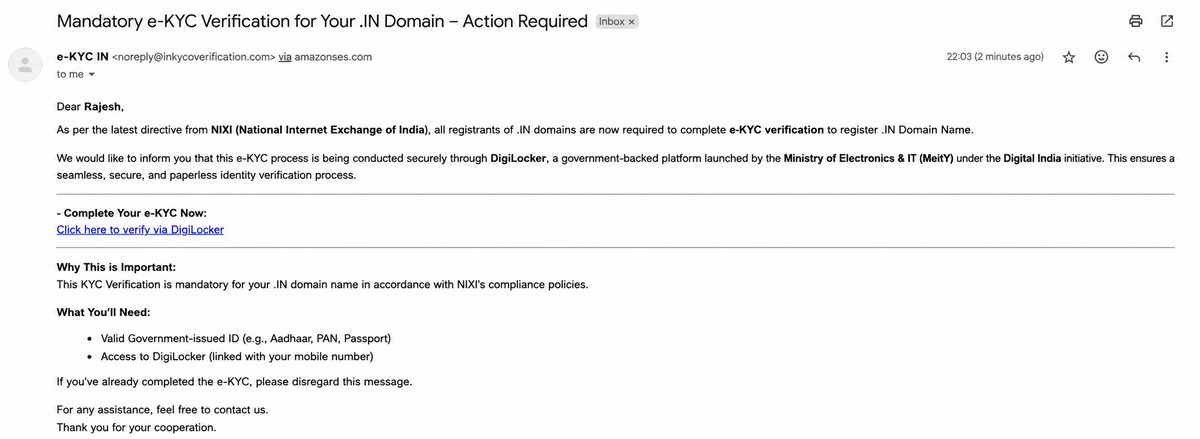
If you are a first-time .in domain registrant, right after you purchase a new .in domain (or .co.in, .net.in, etc.), your registrar will send a KYC verification email to your registered email address.
This email contains a direct, secure link to complete your KYC.
-
Look for subject lines like “Action Required: Mandtory e-KYC for your .in domain” or “Verify your identity - .in KYR Compliance”.
-
Click the “Verify Now” button or "Verify via DigiLocker" link inside the email. This will take you straight to the verification page - you do not need to navigate through the control panel to find it.
If you are an existing customer who has already completed KYC (verified registrant) your KYC profile is already stored and linked to your account.
When you purchase additional .in, .co.in, or other .in family domains, no further KYC is required - you can register and activate domains immediately without repeating this process.
If your KYC was never completed, you will be prompted via email for any new .in purchase.
Step 2: Redirect to DigiLocker
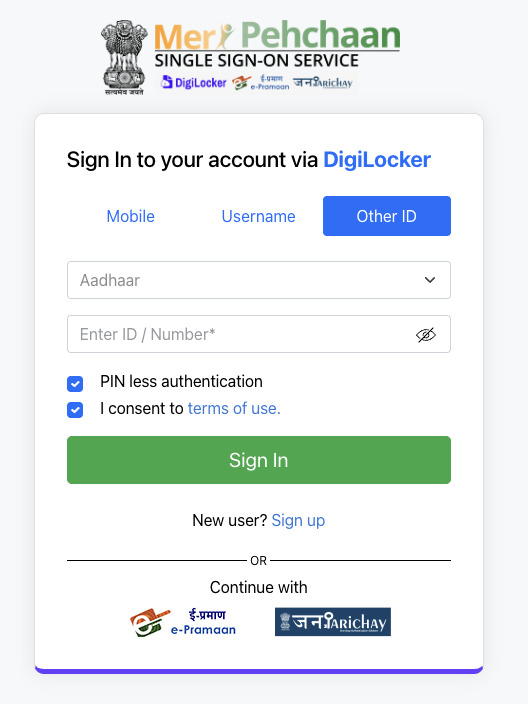
Your browser will redirect to the official DigiLocker authentication page. You will be asked to:
- Select Other ID for verification and select Aadhaar in the list of options
-
Enter your 12-digit Aadhaar number (or Virtual ID).
-
Accept the consent screen, this page will clearly list the registrar/NIXI as the requesting entity and the data being fetched (masked Aadhaar number). Select the Aadhaar by clicking the check box beside it and click "Allow" there is no need to added anything else.
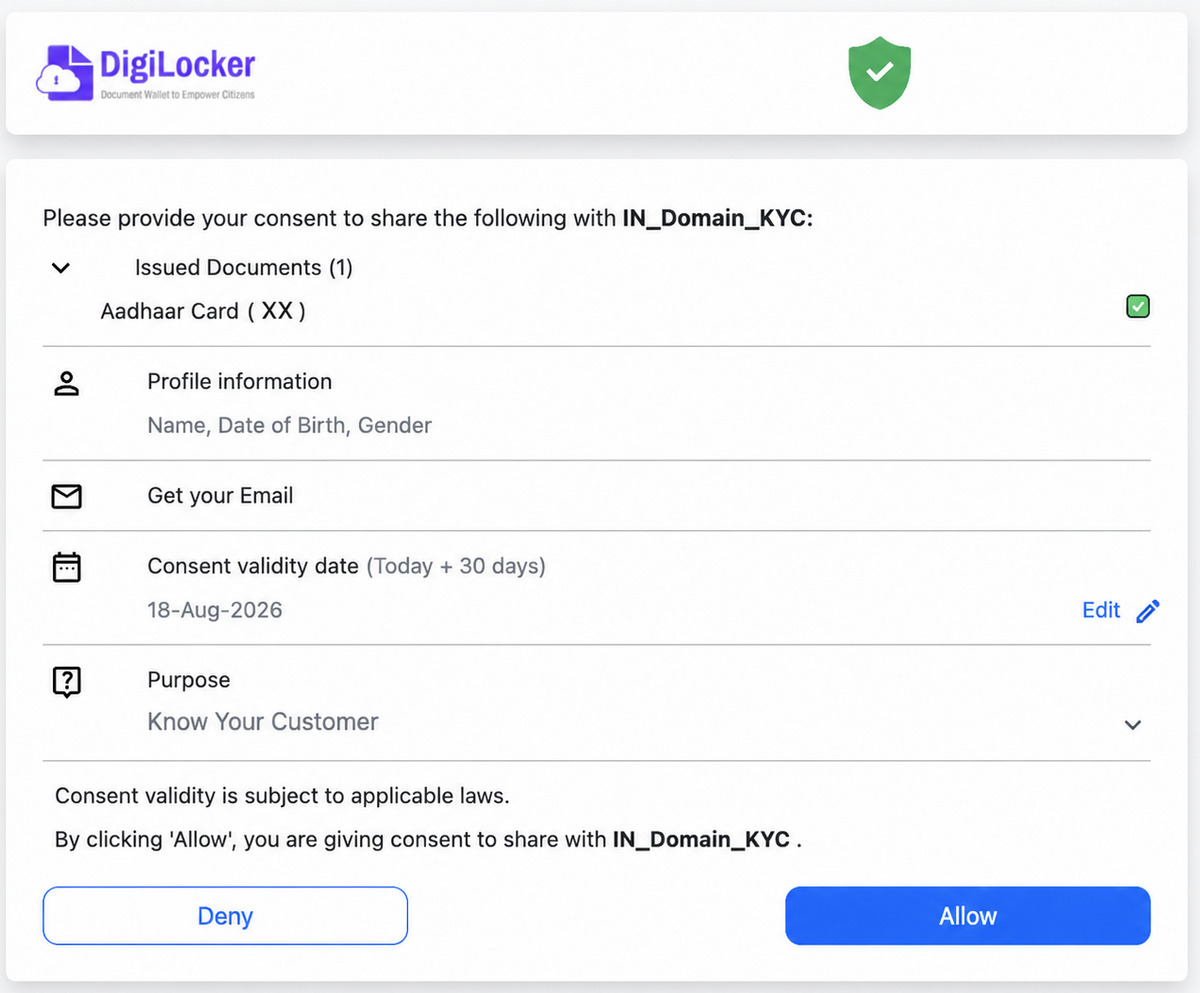
The data fetched is minimal and strictly for KYC compliance, the process uses government APIs and does not store your Aadhaar number with the registrar.
Step 3: Authenticate with OTP
An OTP is sent to the mobile number linked with your Aadhaar. Enter this OTP on the DigiLocker page to grant consent. On successful authentication, DigiLocker securely shares your verified identity details with the registry.
Step 4: Auto-Population & Confirmation
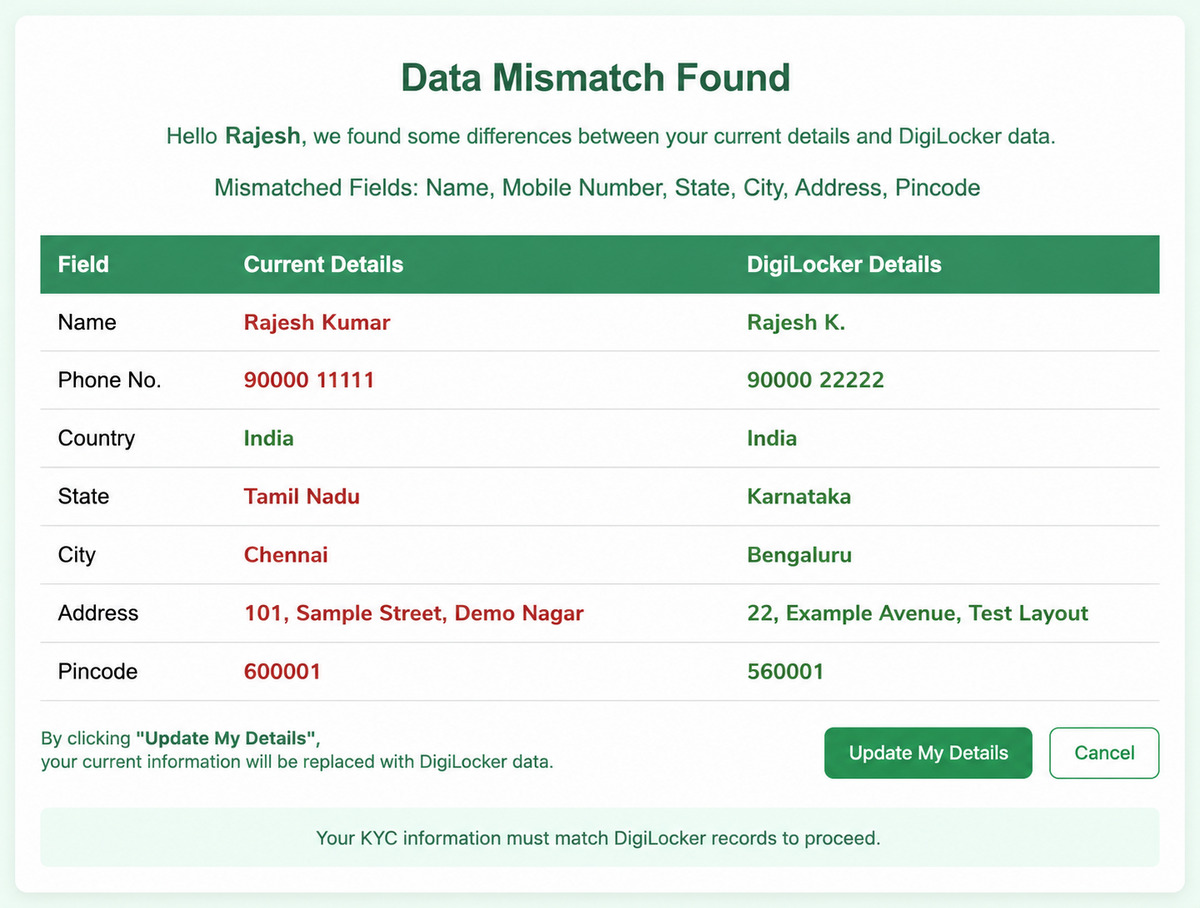
You are redirected back to your registrar’s portal. The KYC form will now be pre-filled with:
-
Full Name (as per Aadhaar)
-
Address
-
Gender and DOB
-
A masked/proxy identity reference
Review the details. If everything is correct, check the declaration box agreeing that the information is accurate, and click “Submit” or “Confirm KYC”.
If there is any Data mismatch, Update with your correct personal details and only after updating your correct details click "Confirm KYC"
Step 5: Verification Status Update
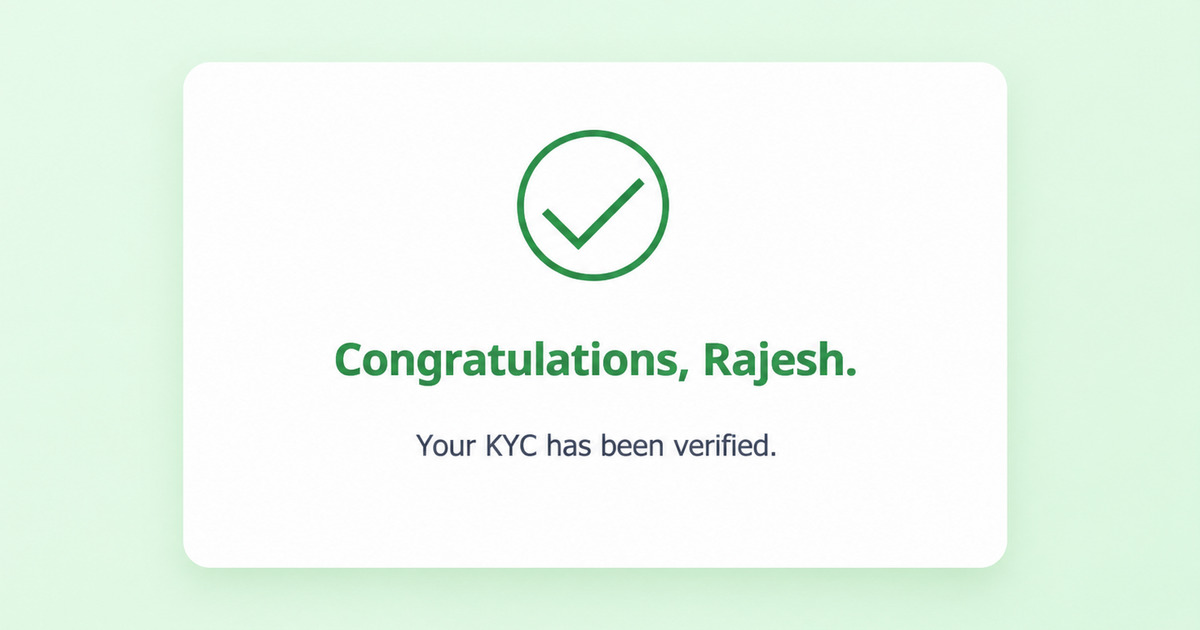
The status immediately changes to “Submitted for Verification” or “Under Review”. Most registrars process DigiLocker-based KYC within a few minutes to a few hours. Once approved, the status becomes “Verified”. You may also receive a confirmation email.
Important Points & Troubleshooting
-
The registrant name must match Aadhaar exactly. If your domain is registered in a slightly different name (e.g., missing middle name), you may need to update your domain’s registrant contact details first, or use a manual document upload instead.
-
Existing domains: If you already own .in domains registered before the mandate, you will receive a deadline to complete KYC retroactively. Do not ignore these emails.
-
Data privacy: The DigiLocker flow shares only a KYC token/masked reference with NIXI. Your full Aadhaar number is never stored by the registrar or the registry.
Why Use DigiLocker for .IN KYC?
-
Instant - No manual review delays, most verifications are auto-approved.
-
Paperless & secure - No need to scan, upload, or send sensitive documents via email.
-
Government-verified - Removes the risk of tampered documents and is fully accepted by NIXI.
Completing your .IN domain KYC is quick, essential, and helps build a safer Indian internet.