


An SSL certificate encrypts the connection between a visitor’s browser and your web server, protecting sensitive data such as login credentials, payment details, and personal information.
Installing an SSL certificate through cPanel is a straightforward process that allows you to activate HTTPS for your domain without relying on command-line access.
This guide walks through the complete installation procedure, from preparing the certificate files provided by your Certificate Authority to verifying that the certificate chain is correctly configured and HTTPS redirection is active.
Log into cPanel and Locate the SSL/TLS Manager
-
Navigate to your cPanel login URL (often https://yourdomain.com:2083 or provided by your hosting provider).
-
Enter your username and password.
-
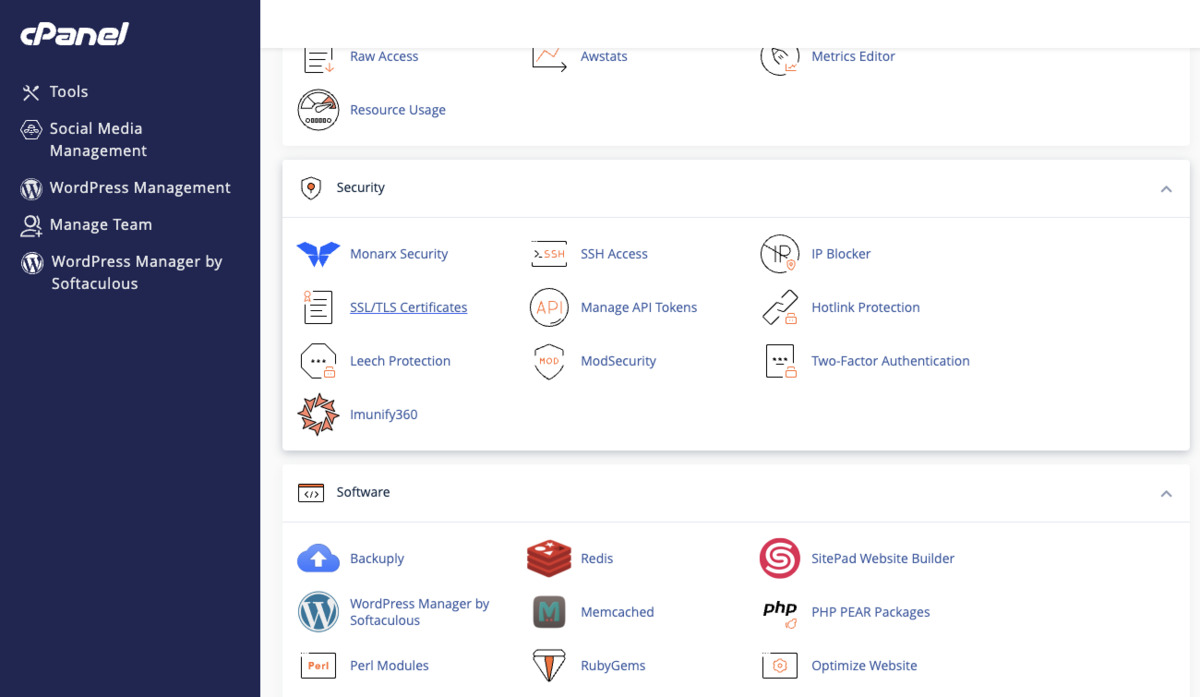
In the cPanel dashboard, scroll to the Security section and click on SSL/TLS Certificate.
Choose the Correct Installation Option
On the SSL/TLS page, you will see several links. The one that gives you full control over pasting certificate data is:
-
Install and Manage SSL for your site (HTTPS)
Do not click on “Manage SSL sites” if it appears as a sub-item under something else; this exact link is the gateway to the manual installation interface. Click it.
Access the Domain-Specific SSL Certificate
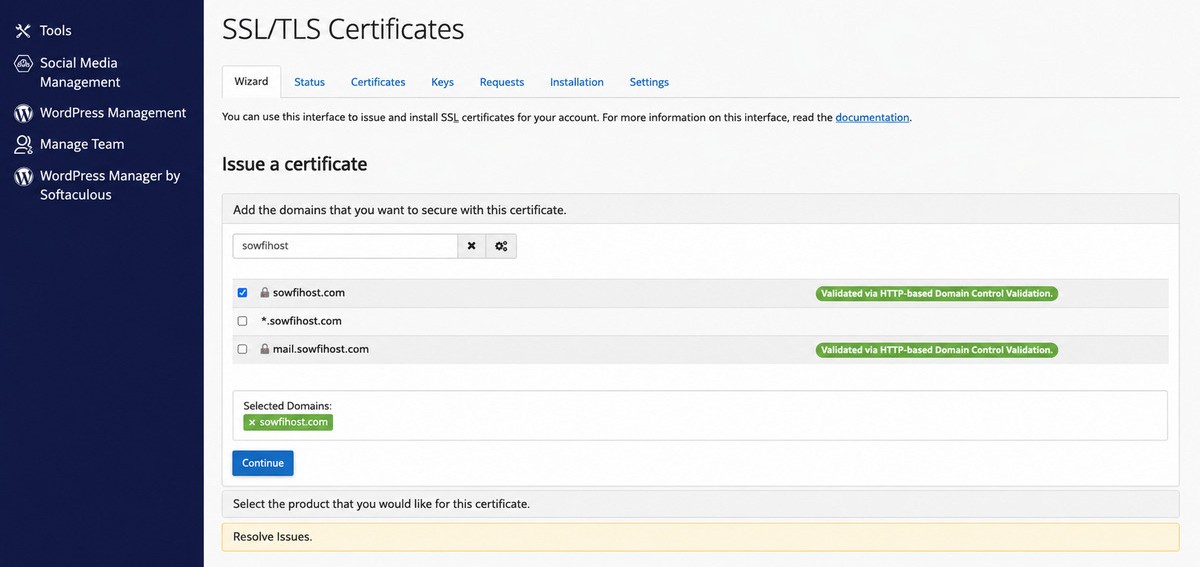
You will now see a page titled Install an SSL Website. You may see a table of domains with already installed certificates.
Scroll down to the section labeled Install an SSL Website (it may be a separate form with a dropdown menu for domain selection). This is where you will paste the certificate data.
If you have multiple domains (including subdomains), you can use the Domain dropdown to select the exact domain or subdomain for which the certificate was issued.
The system will automatically fill the document root and other fields if it detects the domain in your account.
Installing a Let's Encrypt SSL Certificate for a Selected Domain
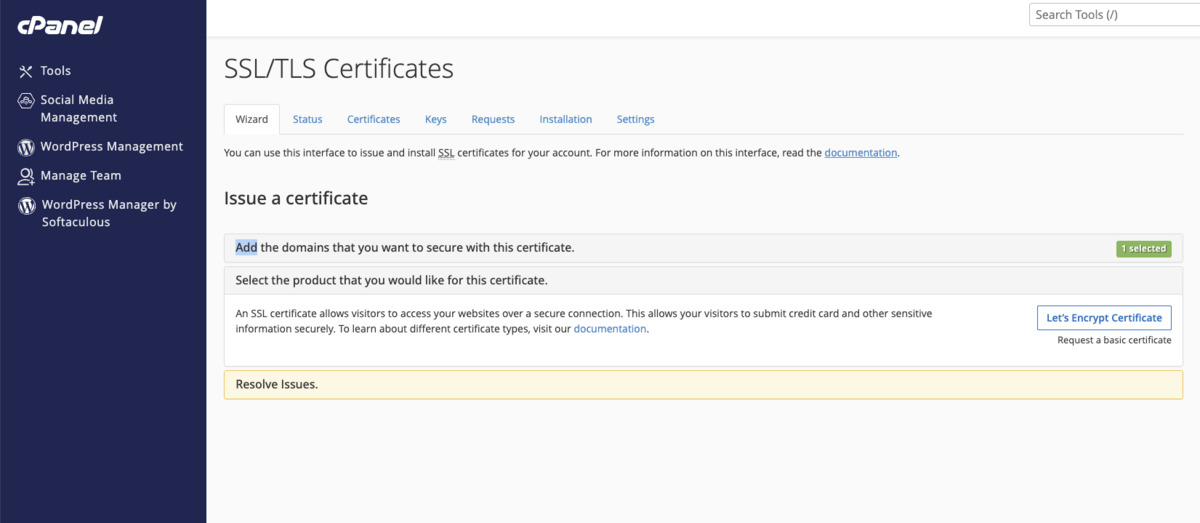
If you have already selected the domain for which you want to secure the connection, you can use the Let's Encrypt integration built directly into cPanel to generate and install a free certificate without manually pasting any files.
Step 1: Navigate to the Let's Encrypt Interface
-
Log into your cPanel account.
-
Scroll to the Security section and click on Let's Encrypt SSL. If you do not see this icon, your hosting provider may not have enabled the Let's Encrypt plugin. In that case, use the AutoSSL feature described earlier or contact your host to enable it.
Step 2: Locate Your Selected Domain
On the Let's Encrypt page, you will see a list of all domains, subdomains, and aliases associated with your cPanel account. Each entry displays:
-
The domain name
-
The current SSL status (e.g., "No SSL" or "SSL Installed")
-
A checkbox or action button for issuing a new certificate
Step 3: Issue the Certificate for the Chosen Domain
-
Find the domain you previously selected from the dropdown or list.
-
If the domain does not have a certificate yet, you will see an Issue button next to it. Click this button.
-
If the domain already has an expired or self-signed certificate, you may see an Issue or Reissue option. Click it to replace the old certificate with a fresh Let's Encrypt certificate.
-
The interface will automatically generate a Certificate Signing Request, submit it to Let's Encrypt, complete the domain validation, and install the certificate on your server.
Step 4: Configure Additional Options Before Issuing
Before clicking the final confirmation, some cPanel themes will present checkboxes for additional settings. Ensure you review these carefully:
-
Include Mail Services: Check this box if you want the certificate to also cover
mail.yourdomain.comand secure incoming and outgoing email connections for that domain. -
Include Wildcard Support: This option appears only if your hosting provider supports DNS-based validation. Enabling it will generate a wildcard certificate covering
*.yourdomain.com. Note that this requires the domain's DNS to be managed on the same server or manually adding a DNS TXT record. -
Force HTTPS Redirection: Some interfaces allow you to automatically add a redirect rule so that all HTTP traffic is sent to HTTPS immediately after installation.
Make your selections based on your needs and click Issue or Confirm.
Verify and Submit
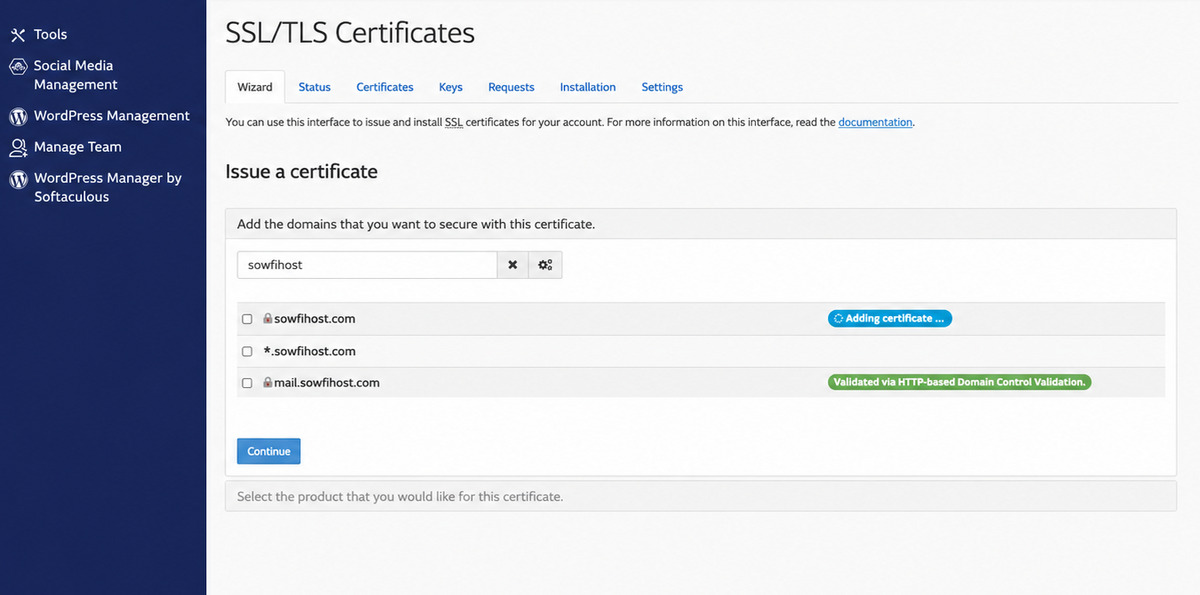
At the bottom of the form, there is typically a button labeled Install Certificate. Before clicking it:
-
Double-check that the domain name in the dropdown matches the Common Name (CN) or Subject Alternative Name (SAN) on the certificate. This match is case-insensitive but must be exact otherwise (e.g., www.example.com vs example.com).
-
If your site uses a mail domain or other services, the certificate will typically secure those as well once installed, provided they share the same hostname. cPanel’s auto-detection will handle this.
Click Install Certificate.
Confirm the Installation and Check the Chain
After submitting, cPanel will display a success message: “The SSL certificate is now installed on the domain.” You may also see a green padlock or a note that the certificate is active. It’s critical to then verify the certificate chain:
-
On the same page, look for a link Certificate Details or simply return to the SSL/TLS manager and click Manage SSL sites (or the same domain link). Click the magnifying glass or details icon next to your domain.
-
You will see a certificate hierarchy: your domain certificate at the top, followed by one or more intermediate certificates, ending with the trusted root. If any intermediate is missing, the page will usually show a warning (e.g., “One or more intermediate certificates are missing”). In that case, you must re-edit the installation, paste the full CA bundle again, and reinstall.
Alternative: Using AutoSSL (Free, Automated)
If you do not have a purchased certificate and your host supports AutoSSL (powered by Let’s Encrypt or Sectigo), installation is nearly automatic.
-
In the Security section, click SSL/TLS Status.
-
If the domain shows a red “X” or a warning that no valid certificate exists, check the box next to the domain.
-
Click the Run AutoSSL button. cPanel will request, validate, and install a domain-validated certificate within a few minutes.
-
Once the status turns green with a padlock, the certificate is active. You can view it by going to SSL/TLS > Manage SSL sites as before.
For subdomains not automatically covered, you can often force inclusion by ensuring the subdomain is listed in cPanel’s Domains interface (as an Alias or Addon domain) and then running AutoSSL again.
Forcing HTTPS Redirection After Installation
Once the certificate is installed, you want visitors to use the secure version.
-
Return to the cPanel home, go to the Domains section, and open Domains or Redirects. Some themes have a direct toggle: under the domain list, enable Force HTTPS Redirect.
-
If that option is absent, use the File Manager to edit the .htaccess file in your website’s document root (often public_html). Add the following lines at the very top:
-
apache
RewriteEngine On
RewriteCond %{HTTPS} off
-
RewriteRule ^(.*)$ https://%{HTTP_HOST}/$1 [R=301,L]
-
Save the file and test the site with http:// in the browser to confirm it redirects to https://.
Troubleshooting Common Issues During Installation
-
Certificate and Private Key Do Not Match: This error appears if the key was generated separately from the CSR used to order the certificate. Retrieve the correct private key from the server where the CSR was created. If you lost it, you must reissue the certificate with a new CSR generated within cPanel.
-
Intermediate Certificate Missing (Chain Incomplete): In the CA Bundle field, paste the full chain file, not just one intermediate. If the CA provided them as separate files, combine them in the right order (domain->intermediate1->intermediate2->root) but omit the root if the CA instructs. Usually, the CA bundle file from your account is ready to paste as-is.
-
Domain Dropdown Shows “No SSL” or Wrong Domain: Ensure the domain is correctly added as a main domain, addon domain, or alias within cPanel. If it’s a parked domain, you may need to convert it to an addon domain or install the certificate via the main domain’s management page.
-
AutoSSL Fails with “DNS DCV” Error: The domain’s DNS must resolve to the server. Verify the A record points to the correct IP, and that no firewall blocks validation calls. Running the check manually from SSL/TLS Status sometimes bypasses temporary issues.
Final Verification
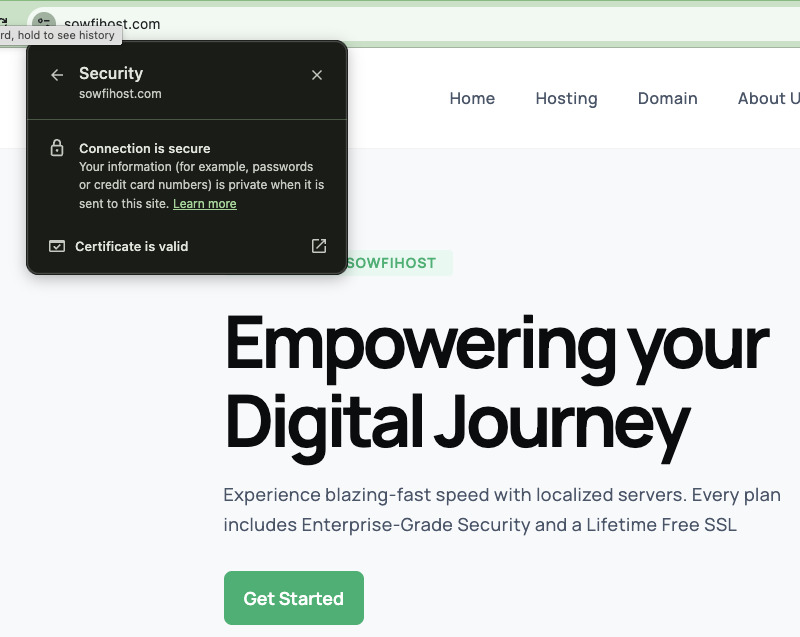
Open a private/incognito browser window and navigate to https://yourdomain.com. Click the padlock icon in the address bar.
The certificate details should show a valid chain ending with a recognized Certificate Authority, no warnings about mixed content, and the correct expiry date. This confirms the installation is complete and fully functional.